CloudFront Integration
IntelliFend seamlessly integrates with the CloudFront CDN through the Interceptor integration mode, leveraging the Lambda Edge function. Our worker.js script deployed in Lambda Edge intercepts requests, determining whether to allow, block, or challenge traffic with Captcha.
The following procedure outlines the high-level steps for setting up CloudFront integration:
- Obtain your IntelliFend Account Key
- Create IntelliFend Secret in AWS Secrets Manager
- Deploy CloudFormation Stack using IntelliFend Template
- Configure integration in IntelliFend Back Office
For optimal operation, our product utilizes additional AWS infrastructure, such as Lambda@Edge. Please note that these infrastructure charges will be billed separately from your AWS Marketplace transaction.
Prerequisites
An active CloudFront distribution that serves your web application.
Step 1: Obtain your IntelliFend Account Key
-
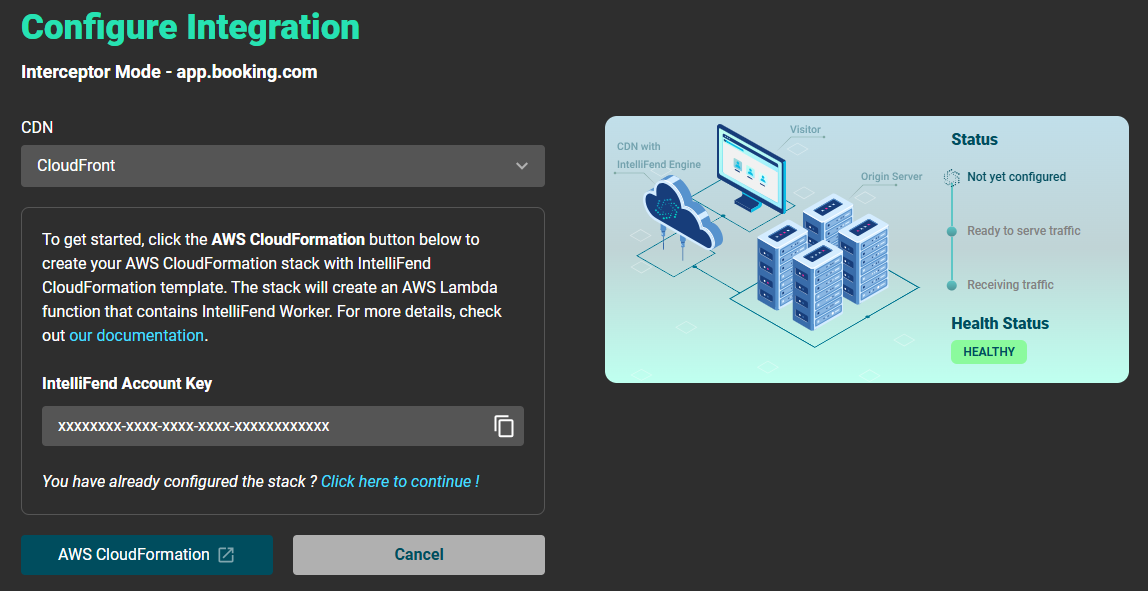
Login to IntelliFend Backoffice, go to Integration > click on Application name and select CloudFront as your CDN. You will see the guideline to configure the CloudFormation Stack and IntelliFend Account Key.
-
Click the AWS CloudFormation button to configure the IntelliFend Worker using the IntelliFend Template (Step 3). Before setting up the CloudFormation stack, make sure to create a Secrets Manager entry that contains the IntelliFend Account Key (Step 2).
Step 2: Create IntelliFend Secret in AWS Secrets Manager
Create a secret that includes your IntelliFend Account Key and other configuration details.
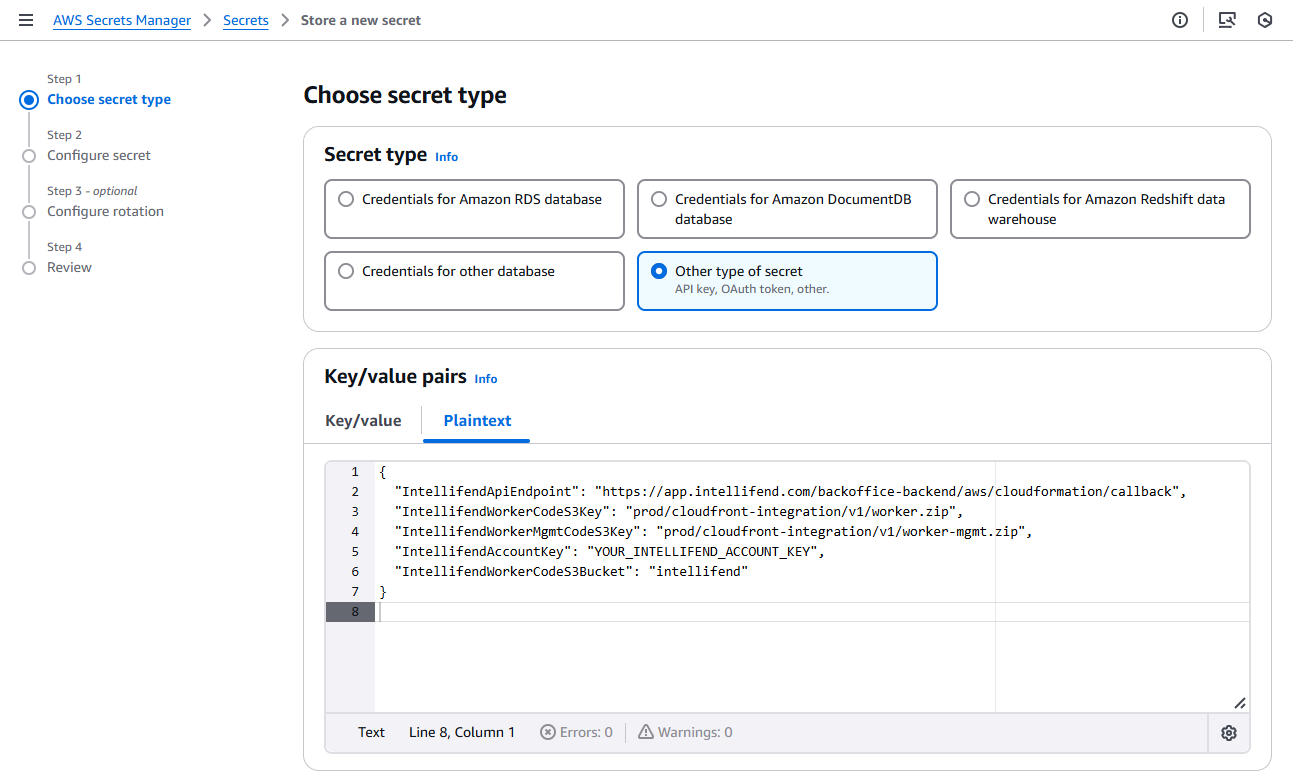
- In your AWS account, go to Secrets Manager and click on Store a new secret
- For Secret type, select Other type of secret. Under Key/value pairs, choose Plaintext, then paste the following JSON string. Replace
YOUR_INTELLIFEND_ACCOUNT_KEYwith your IntelliFend Account Key shown in the IntelliFend Back Office (Step 1).
{
  "IntellifendApiEndpoint": "https://app.intellifend.com/backoffice-backend/aws/cloudformation/callback",
  "IntellifendWorkerCodeS3Key": "prod/cloudfront-integration/v1/worker.zip",
  "IntellifendWorkerMgmtCodeS3Key": "prod/cloudfront-integration/v1/worker-mgmt.zip",
  "IntellifendAccountKey": "YOUR_INTELLIFEND_ACCOUNT_KEY",
  "IntellifendWorkerCodeS3Bucket": "intellifend"
}
- Go to Step 2: Configure Secret
Enter a name for your secret, for example: intelliFend-bot-management.
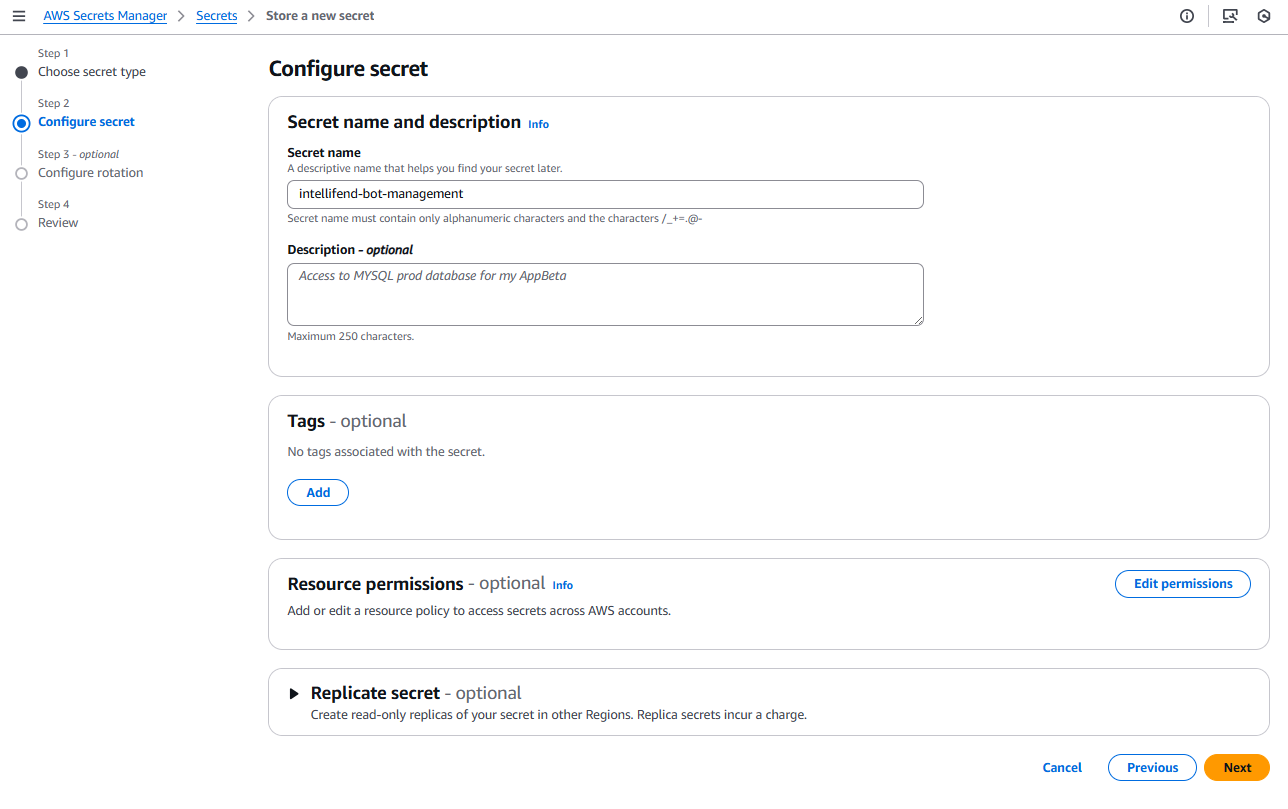
- Click the Next button, then proceed to Step 4: Review.
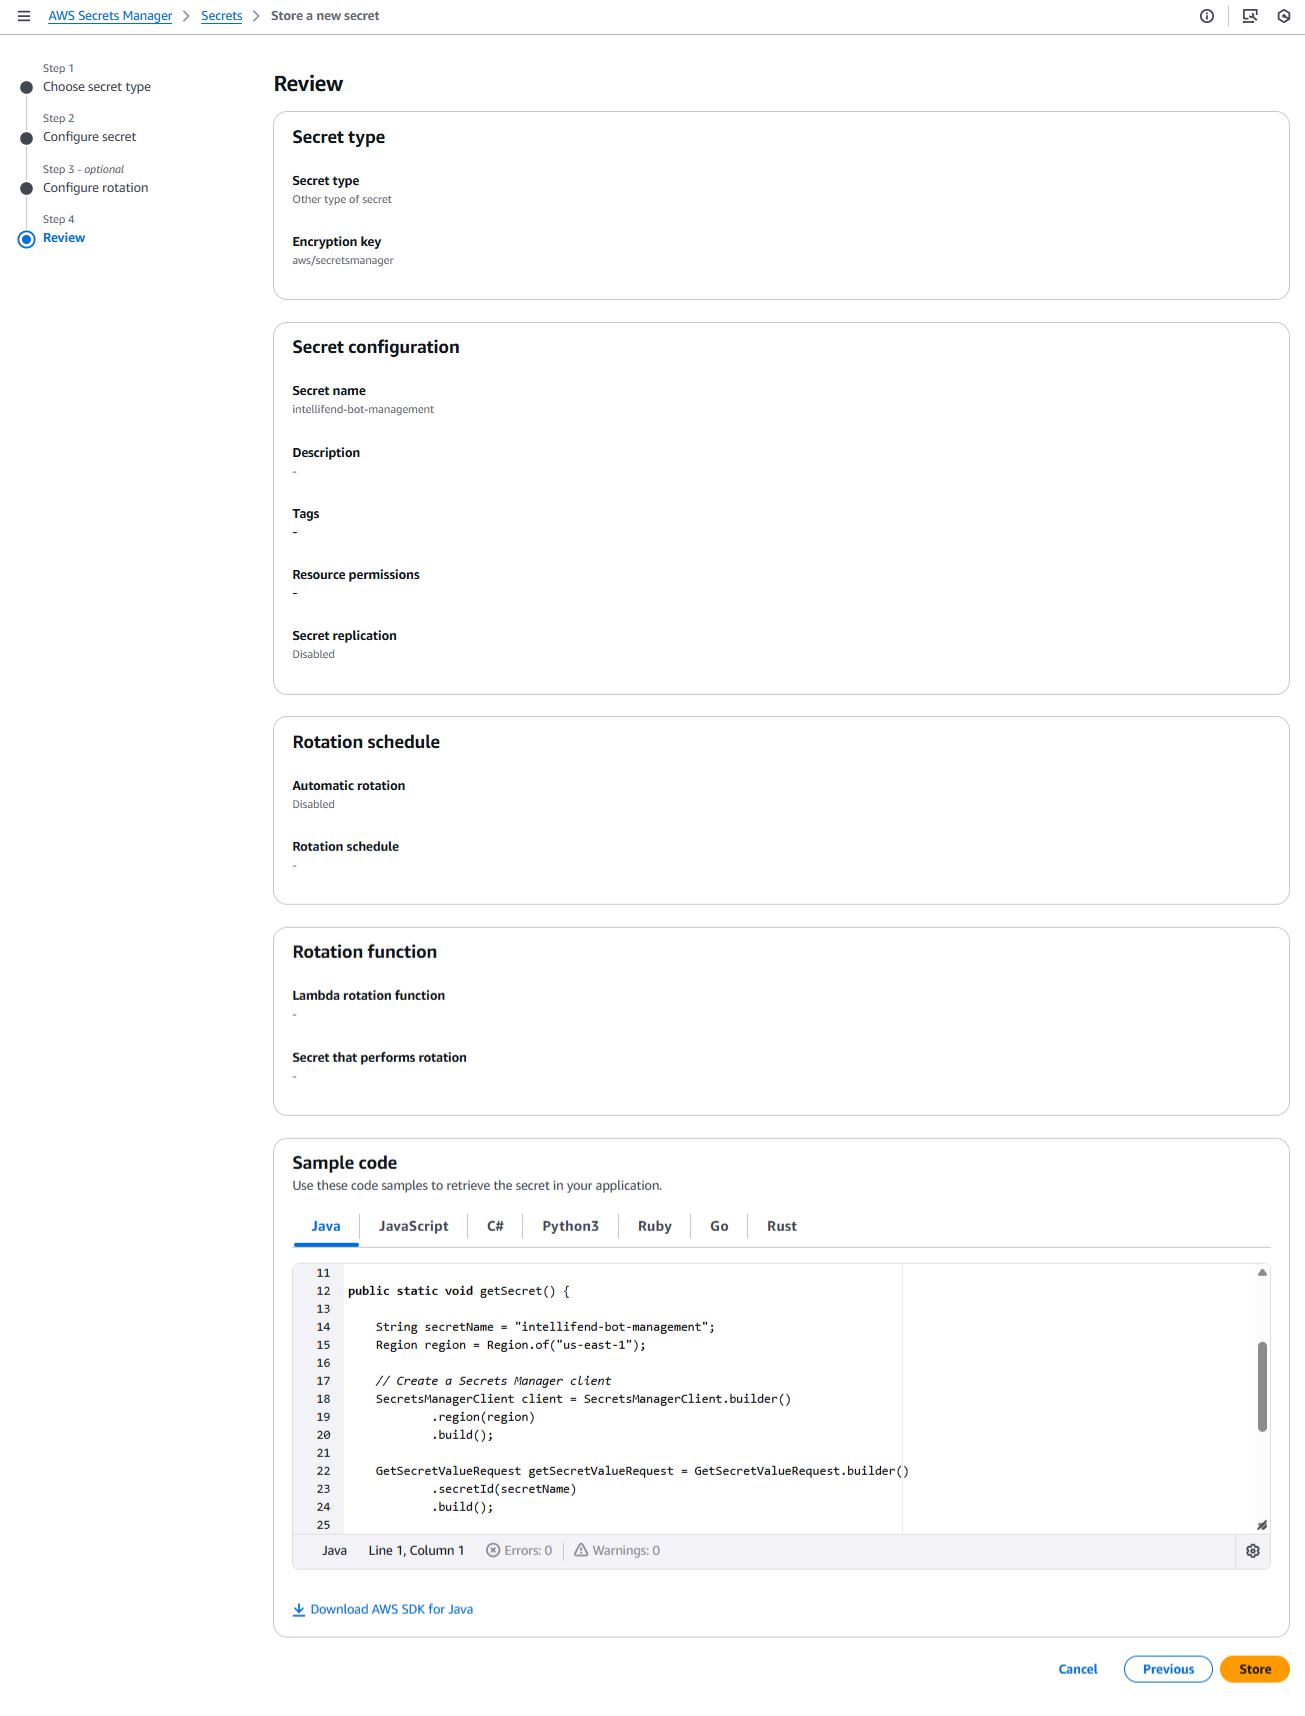
Review Your secret configurations, click Store to save your secret.
Step 3: Deploy CloudFormation Stack using IntelliFend Template
In the IntelliFend Backoffice, when you select CloudFront in the Integration Form, a setup guide will appear. Click the AWS CloudFormation button to navigate to the CloudFormation service.
The CloudFormation template automates the deployment of the IntelliFend Worker in your AWS account, including setting the necessary permissions for log forwarding and bot behavior analysis. This streamlines the setup and simplifies the configuration process. Once the CloudFormation stack is successfully created, return to the Backoffice to complete the integration and start the bot analytics.
-
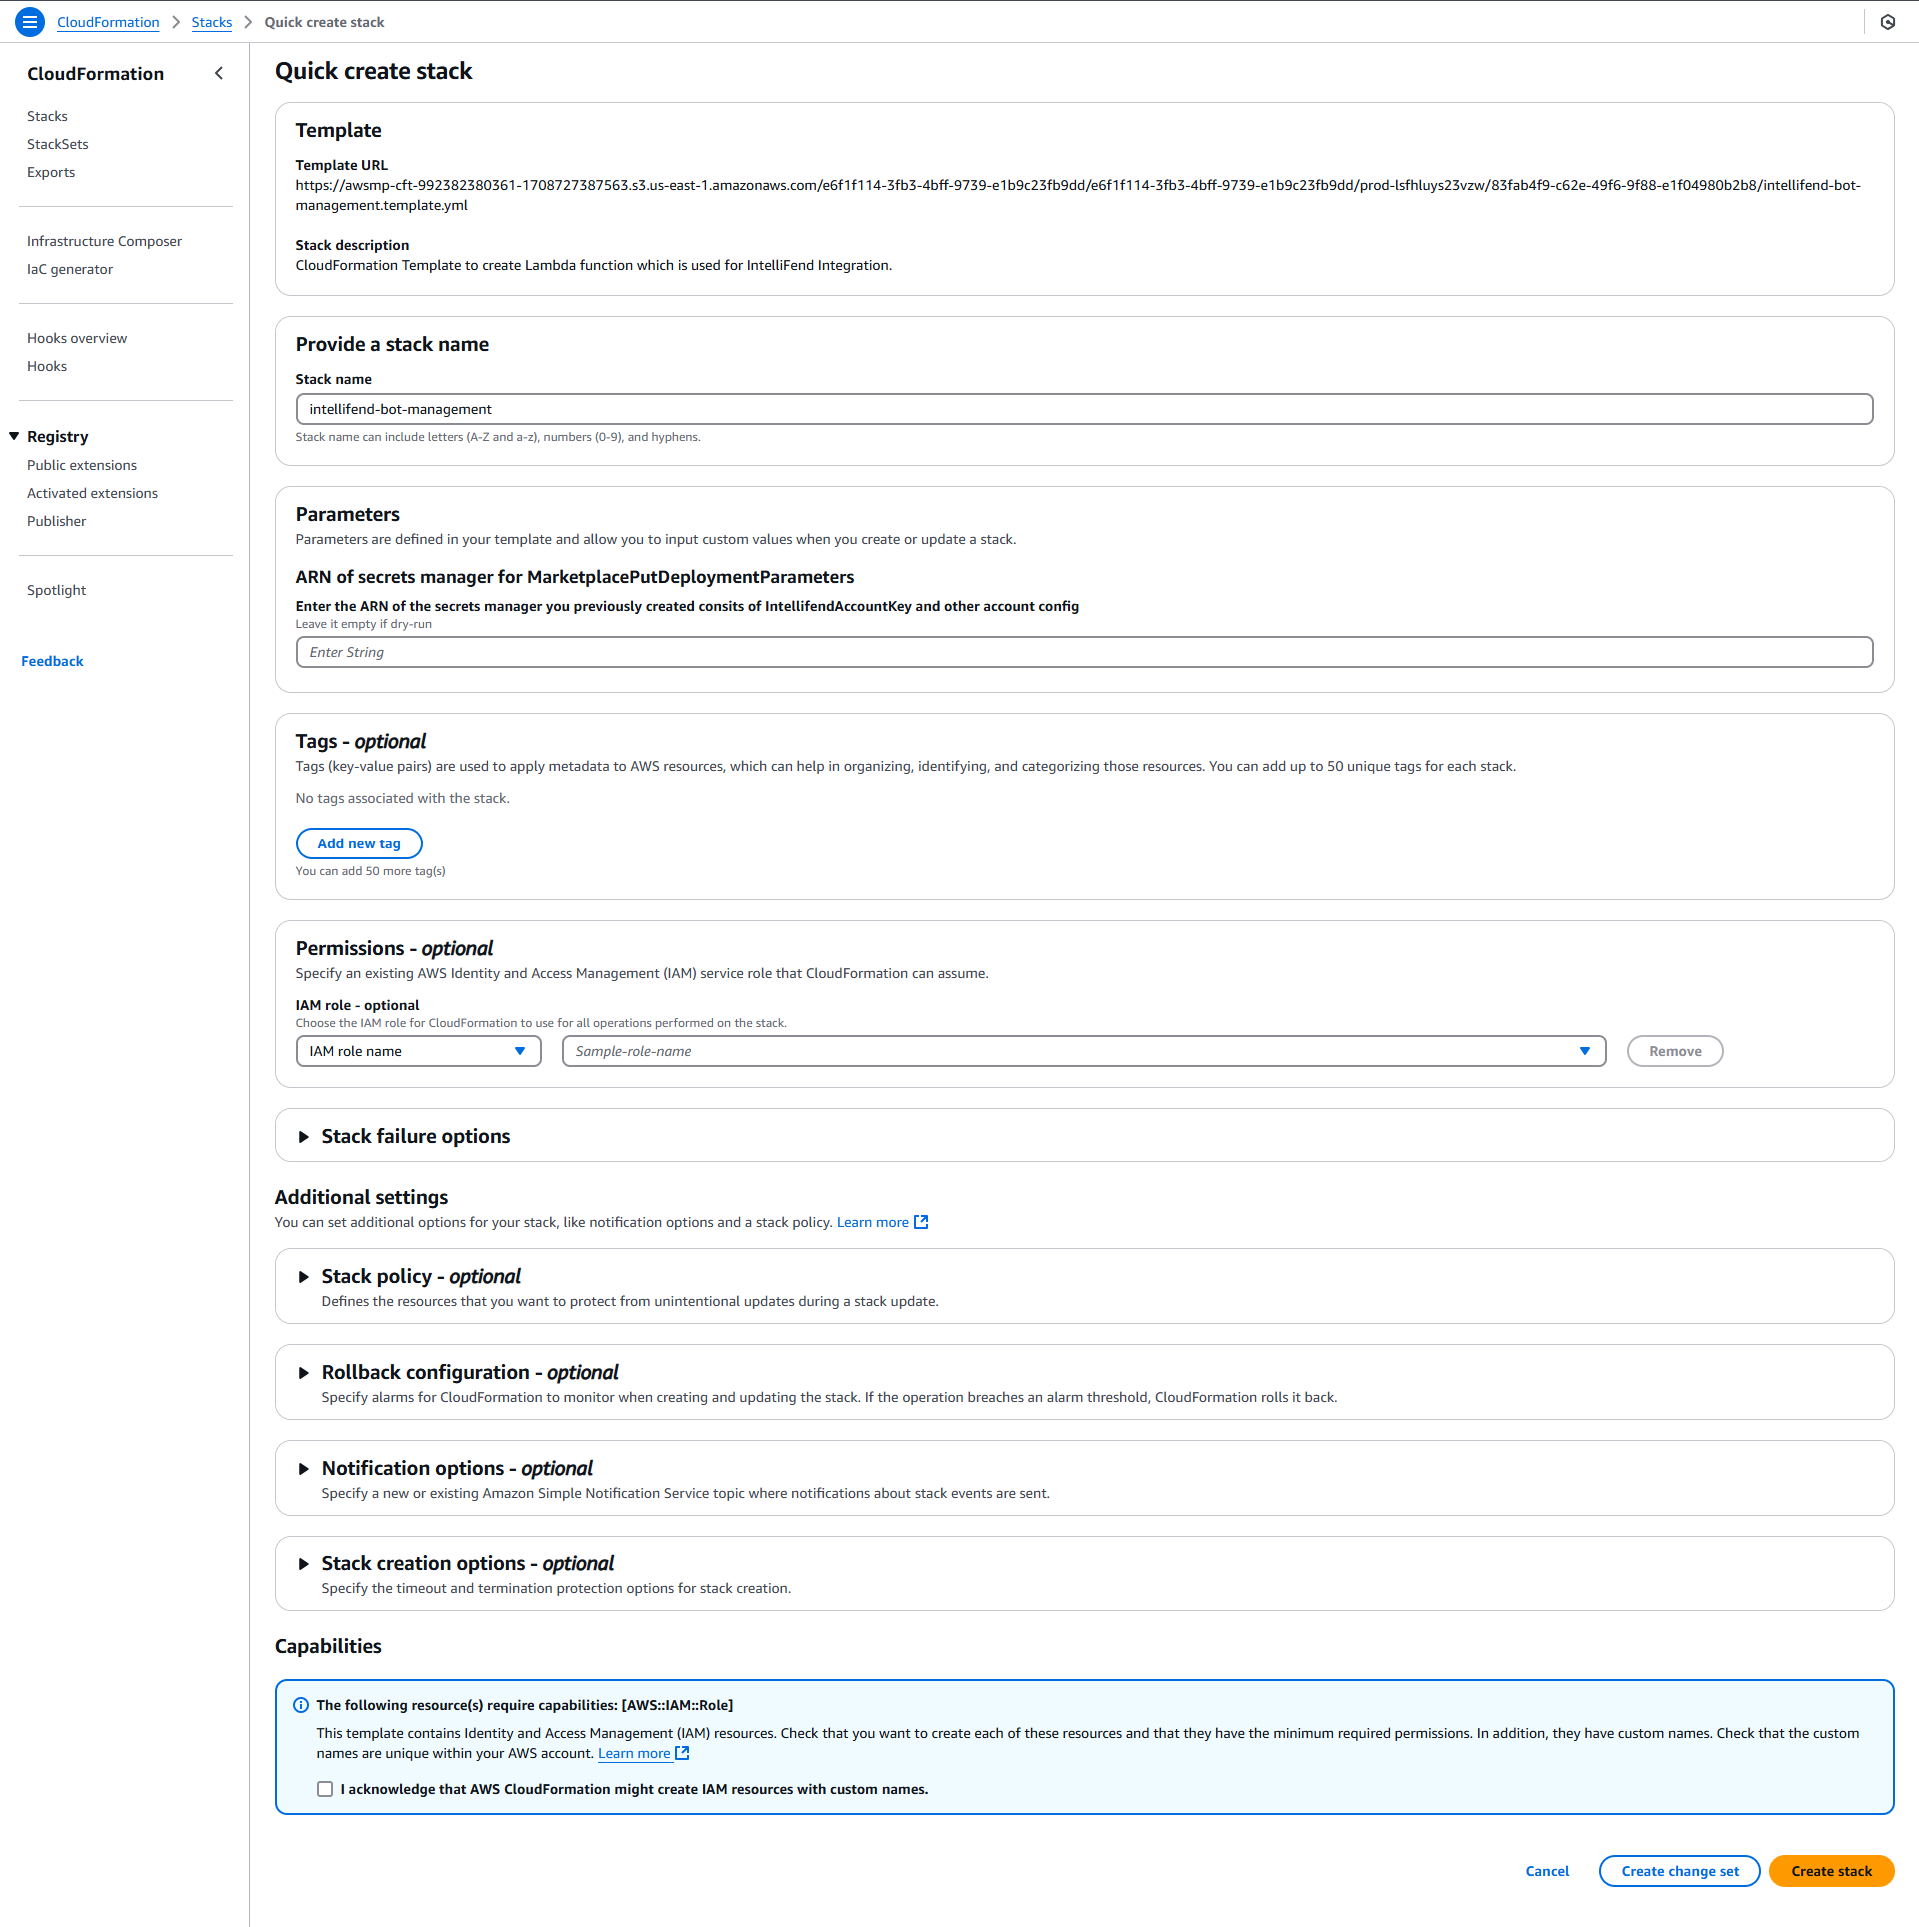
On the Quick Create Stack page:
- Template URL: Use the IntelliFend Template.
- Stack name: You can customize the stack name; the default is intellifend-bot-management.
- ARN of Secrets Manager for MarketplacePutDeploymentParameters: Enter the ARN of the Secrets Manager you created in Step 2, which contains the
IntellifendAccountKeyand other account configurations. - Check the box I acknowledge that AWS CloudFormation might create IAM resources with custom names.
- Click Create to launch the stack.
-
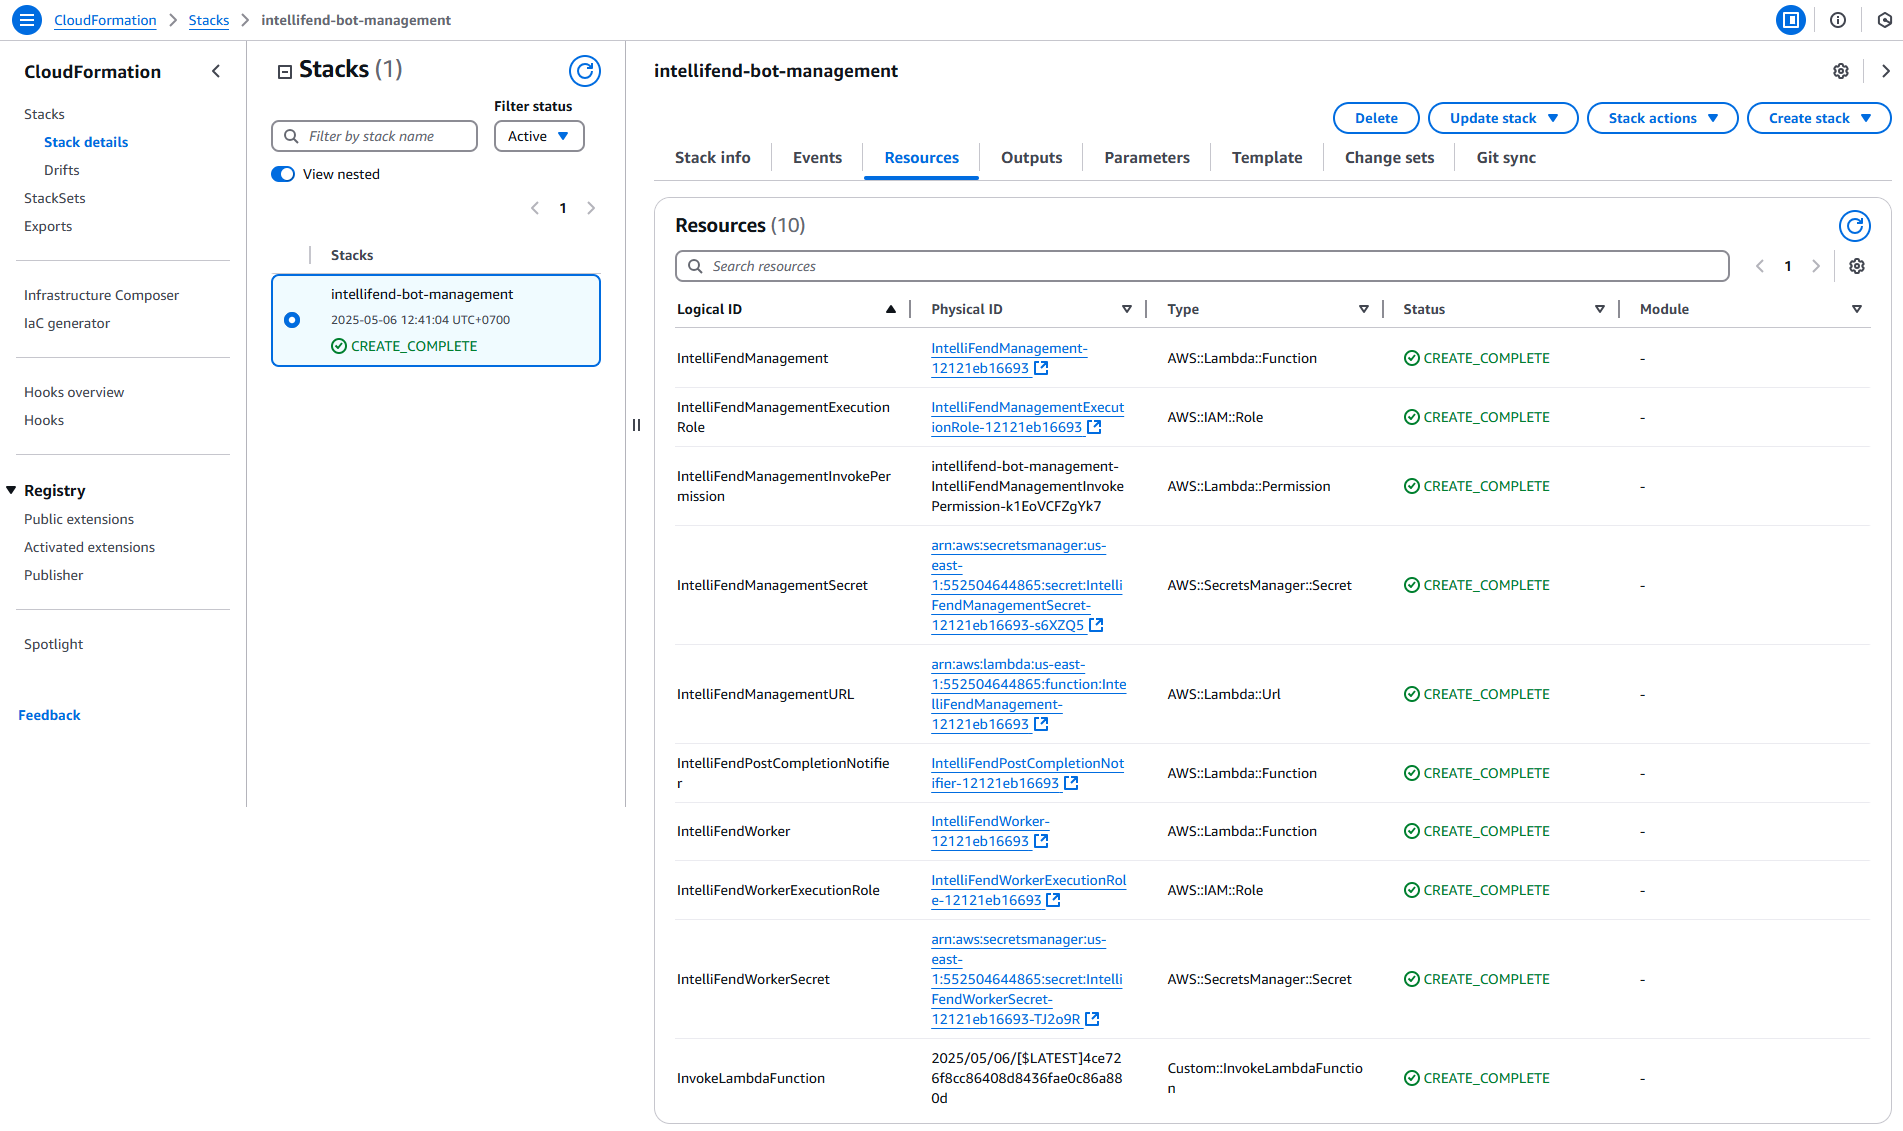
After clicking the Create button, you will be redirected to the Stack page where you can track the creation progress. Wait a few minutes until the stack is fully deployed. Once completed, you can view the created resources under the Resources tab.
- IntelliFendManagement
- IntelliFendManagementExecutionRole
- IntelliFendManagementSecret
- IntelliFendWorker
- IntelliFendWorkerExecutionRole
- IntelliFendWorkerSecret
- IntelliFendPostCompletionNotifier
Step 4: Configure integration in IntelliFend Back Office
After completing Step 3, return to the Integration page in the IntelliFend Back Office and follow the steps below to integrate your application with IntelliFend:
- Go to the IntelliFend Back Office and click on Integration in the left navigation pane.
- Click the name of the application you want to integrate. Ensure that the integration mode is set to Interceptor.
Note: If you see the Quick Launch Guideline, click the Click here to continue link to fetch your application domains.
If you do not have the desired application, please contact us to create one for you.
-
Provide your information in the integration form.
- API: Turn on the toggle if your application is served for API requests only. You need to provide the Parameter name of API key () to generate the Visitor ID of the API request.
- Block setting: Turn on the toggle if you want to specify the Blocking page when a visitor is blocked by mitigation action. Turn off the toggle to use the IntelliFend default blocking page.
- Domains: Select the domains that you want its traffic to be intercepted by IntelliFend. The dropdown list shows all domains that belong to the Access Key.
-
Review the information and click the Save button.
You have completed the steps to integrate with IntelliFend. Wait for your configured CloudFront Distributions to be successfully deployed. Your traffic will now be routed to IntelliFend for bot analytics and mitigation.